Friday, November 26, 2010

Update

I can't believe it has been three months since I last posted.  After the dry-in, we have been working steadily on the house and property, mostly by ourselves, but occasionally with help.  These are the highlights, month by month.

September:  We plastered the part of the concrete block wall that was going to have back fill up against it, and painted the plastered wall with two coats of Drylok.  French drains were put in at the base of the foundation and covered with gravel and landscape cloth.


We also built the frame of the north porch.  It has four 6"x6" treated posts supporting 2"x12" poplar beams that in turn support the floor joists. 


October:  Two exciting things happened at the beginning of October; first, we moved from our rental house in Linden to the basement of our new house, and second, we rescued a little squirrel that our neighbor's dog tried to carry off.


This is Rodney (the rodent) in his first box at about 6 weeks old (as we found him).  He mostly took puppy formula milk from a dropper, but also ate some grapes, cracked hickory nuts and chewed on pinecones.

Also during October we started putting up the 4'x10' sheets of Certainteed fibercement board siding.  They weighed about 100 pounds each and most were put up by just Randy and me.  This is a picture of where we were on Halloween.  It shows the scaffolding for putting up the fibercement board, the french drains covered with landscape cloth and the plastered and painted basement wall.


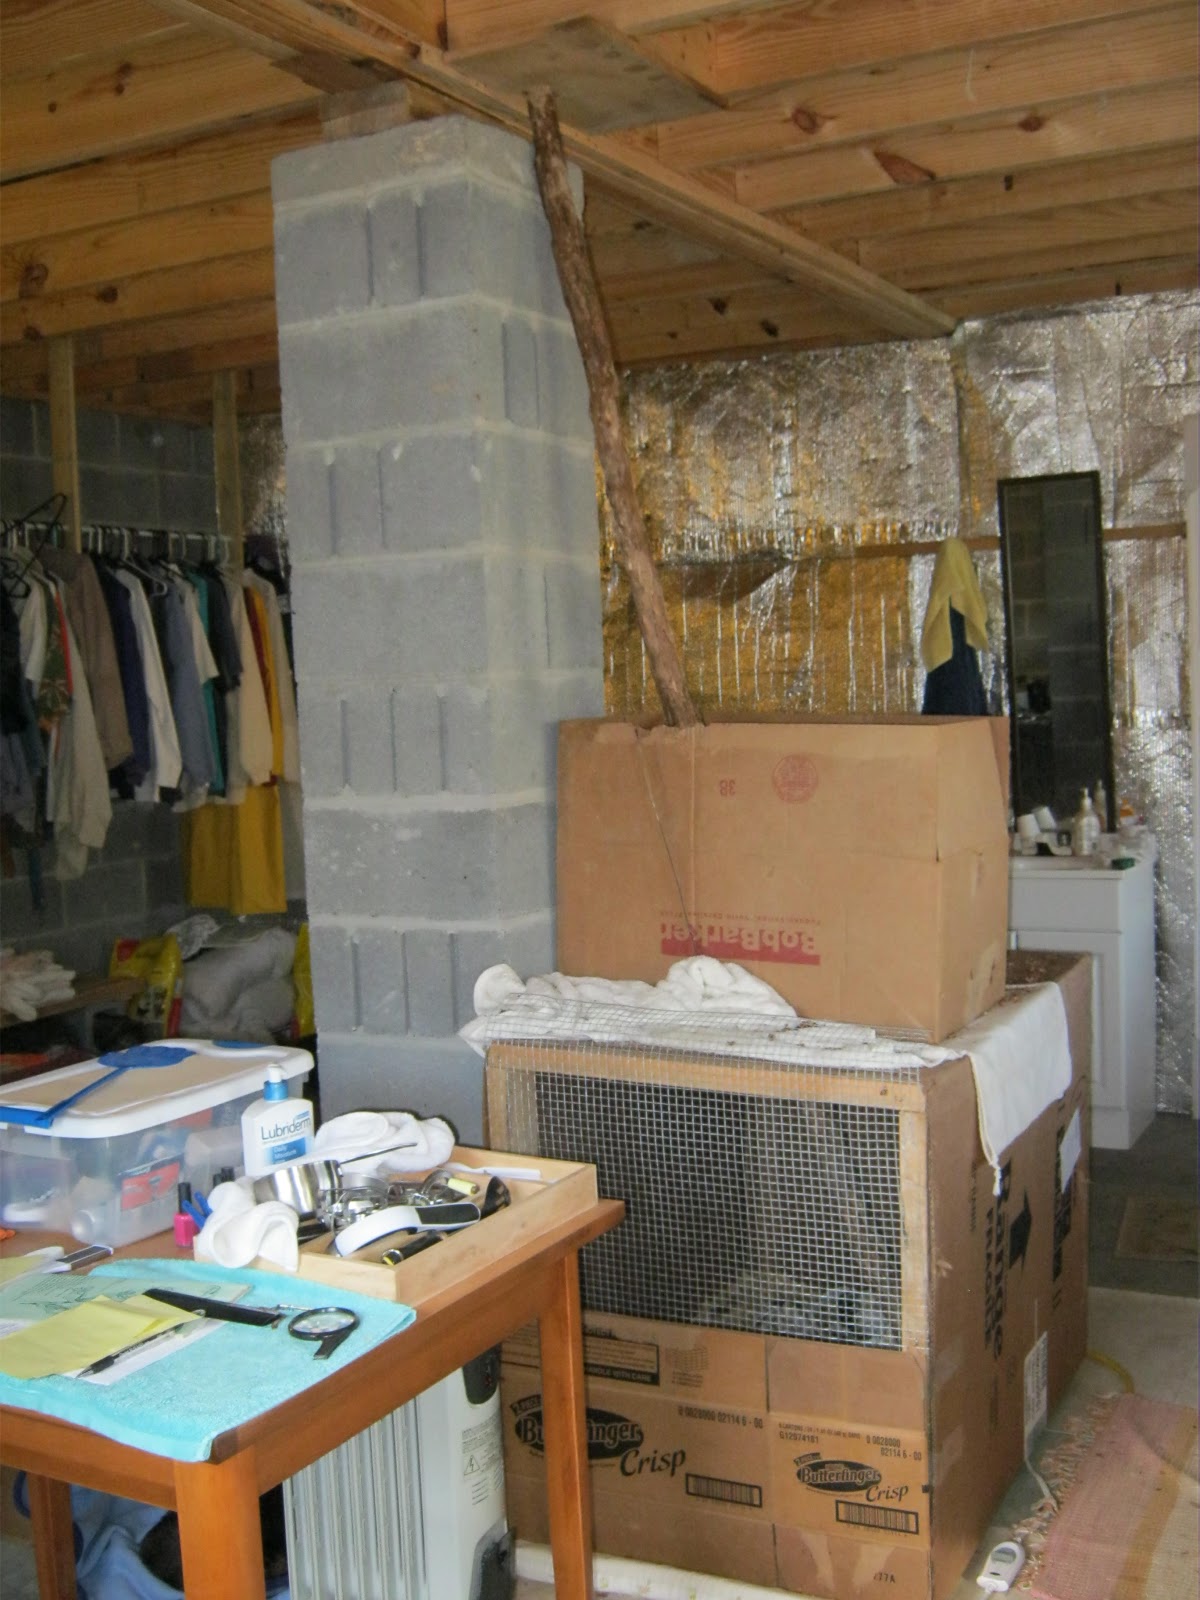
November:  Rodney was weaned in early November and had graduated to a new cage that allowed him to climb out into the house via an 8' pine branch.  He was getting braver and eventually we let him outdoors.  Now he is outside most of the time, playing with other squirrels in the woods, but he occasionally comes home to fill up on nuts that we crack for him, cucumber, cauliflower and acorns.


Also, this month we had the fill put in around the basement, and had the yard "sculpted" so that water coming down the hill on the south side would be channeled away from the house.  This is our friend Ernest working the earth moving equipment, and the final back yard.


This next picture shows the house as it is now, and the following two are pictures of our cozy home in the basement.


Tuesday, August 24, 2010

The house is dried in!

Yesterday the builders finished putting on the Galvalume roof, which finished the drying-in phase.  The following pictures show where we are now.  This view is looking NW.  Notice the upstairs windows (south wall) are shaded by the roof overhang.  The downstairs windows and door will be shaded by the greenhouse roof.  In the winter, the sun will illuminate the upstairs windows.

This is a view from the driveway.  Notice the butterfly fluttering by.

This is a view from the livingroom looking up to the loft.  The bathroom is at the bottom right and the corner of the kitchen is at the bottom left.

Below is looking into the kitchen from the livingroom.  The kitchen is about 20 ft by 9.5 ft.  At the left is a half wall to the diningroom.  The doorway in the foreground will be left open and the woodstove will be right in front of the wall to the right.

Below is looking from the livingroom toward the diningroom and the stairs to the loft.

This is the loft.  At the far end will be the bedroom and the study will be at the top of the stairs.

This is looking downstairs from about halfway down the stairs.  The livingroom is at the lower right.

This is the bathroom as viewed from the livingroom.  The bathroom is about 7 ft by 10 ft.

The next phase will be installing the Certainteed fiber cement board siding and building the porch on the north side.  The siding is comprised of 4 ft by 10 ft panels that weigh about 100 lb. each!  We will take a couple of weeks breather before starting the next phase.  Meanwhile, we will be caulking and sealing and taping the walls, and waterproofing the concrete block walls of the basement.  After the basement walls are waterproofed and french drains installed, we will have dirt backfilled up to a bit above ground level.  Stay tuned . . .

Sunday, August 15, 2010

Topping off

We have been in the midst of a major heat wave, which has really been unabated since the end of May.  The days have been in the high 90's to the low 100's almost every day and the nighttime lows are in the mid 70's.  It has been very difficult working outdoors in these conditions.  However, the framing is continuing and the rafters are going up!  This picture shows the first rafters being put in place and the next one shows two of the framing crew; Joe and Carlos, with Randy on the right.  In between Carlos and Randy you can see one of the 6 x 6 poplar posts and some of the 2 x 12 poplar girts we are using for the framing.  Tulip poplar is plentiful in this area and these timbers are rough sawn from a local sawmill.


The picture above is taken from the living room looking toward the kitchen.  The landing for the stairs to the loft is above and to the left of Carlos.  Below is shown a view of the rafters from the living room.  The final picture shows where we are as of August 14.


Sunday, August 8, 2010

Framing up the house

Our builders finally started framing the house on August 2.  In this picture, the subfloor is complete, and half of the north wall is going up.  The north wall is 15 feet high and has a double door and two windows in it.

Here, the complete north wall is up and is being leveled and braced.

And, as of August 6, part of the south and west walls up.  The last picture is our view of the creek, looking north from the "living room".


Saturday, July 24, 2010

Our New House

We have spent the last 2 months designing our new house on the hill, negotiating with builders and ordering supplies.  The basement is now finished (except for waterproofing) and the framing is supposed to start Monday!

This is looking down the hill at the basement (looking north).  Our power pole is in the middle and the creek is the white line just beyond the first trees.  The next picture is a closeup of the back of the basement wall.  The little "wingwall" sticking out is a support to help hold the wall against the weight of the backfill.  The wall has rebar every other block and every cell is filled with concrete.

The next picture shows the floorplan.  There will be a 10 ft by 32 ft screened porch on the north side and a 8 ft by 32 ft sunroom on the south side.  There will be a balcony off of the study in the loft and a carport on the west side.  The sunroom will be used as a greenhouse in the winter.
The next picture shows the east elevation and the following one is the loft plan.

Sunday, June 27, 2010

The Flood of 2010

This is my first post in several months.  We were hit by the floods that ravaged the Nashville area on May 2.  The church we were renovating was caved in, our Honda car was totaled and the little "guest cabin" we were living in was washed away.  There was a river of water that covered Hurricane Creek Road three feet deep.  The church had been in that location for almost 100 years and water had never been inside it before.  They say this was a 500 year flood. 

We waded through knee-deep water early in the morning on Sunday May 2 with our two cats and the clothes on our backs.  The creek overflowed its banks about 6:00 am and by 6:30 it was lapping at our door.  We drove our truck to higher ground and watched as our possessions floated away.  We stayed over night in the truck cab, then spent the next four nights in a tent because we could not cross the creek in the truck.  The tent had been in the storage room near the church, which was flooded but did not float away.  Our refrigerator, which had been just outside the church, floated down the creek about 1/4 mile and we were able to salvage some food from it.


The first picture shows the front of the church and the Honda (after spending two days digging it out by hand).  Next is the back of the church.  The cabin floated down the creek and landed about 1/8 mi down, on the opposite side and then fell over a few days later.  The last picture shows a typical view of piled up debris down the creek.  The box is one of our dressers from the cabin.

This has been difficult to write about and I have been putting it off.  We got a new computer about two weeks ago and just got back connected to the internet on Wed.  We are renting a house in Linden, about 10 miles from the property, and hope to move back by September.  Actually, we are much better off than some of our neighbors, who had 1 foot of water in much more expensive homes.  We applied to FEMA and were very pleased with how they responded.  So, life goes on.

We are now building a small house up the hill from the creek.  It is 20 ft by 32 ft, about the same dimensions as the church, except it will have a full basement and a 1/2 loft.


This is a view of the new house site from about where the cabin had been.  The floodwaters got about halfway up this hill towards the house site.  The excavators are digging the footers for the foundation.

This is the concrete being poured for the slab and the concrete block wall for the basement going up.  This is where we are today.  Stay tuned!

Thursday, March 4, 2010

Lasagne Gardening, part 2

Today we cleaned out the barn of our neighbor, James.  He has 5 horses and 3 mules (who used to range on our property as well, until last December).  We filled the entire truck bed with manure and hay, then we took it over to our new garden beds and shoveled it in.  We made a third bed, this time without the cardboard layer on top of the grass.  Since the layer of manure/compost is so thick, we figured that would smother out the grass eventually.  We still put cardboard in the pathways and under the sides of the beds a little ways, as well as on top of the whole pile.


The first picture is Elvis (left) and Lady, with cockleburs in their forelocks.  The second picture shows the three garden beds.  The closest one is finished and covered with cardboard, the middle one has the manure piled in (about 10 inches thick), and the far one has just been started.  The last picture is my helper/poop scooper.

Saturday, February 27, 2010

Lasagne Gardening

This is our first raised bed garden plot.  It is approximately 4' x 10'.  We plan to build several of these over the next month to get started on our spring garden.  We decided not to till the ground at all.  The soil is very compacted and somewhat clayey, but there are many earthworms (several for almost every spadeful of ground) and we don't want to chop them up with a tiller, nor do we want a heavy tractor on the land.  So, we are doing a type of sheet mulching, or lasagne gardening.


First, we laid cardboard down on the grass and staked it down.  The stakes also hold up the walls of the raised bed, which are logs from downed trees in the woods.  Next, we collected horse manure from the pasture around the garden.  Within about 100' of the garden, we collected enough manure to make a layer about 6" deep.  Next, we put down a layer of leaves (not shown) and finally a wheelbarrow load of good soil from near the creek.  We watered the whole bed with several buckets of creek water, then covered over with another layer of sheet mulch (cardboard/newspaper/brown bags) and weighted it down with wood.  We will pull back the top sheet mulch layer and add more compost/manure/leaves/soil until we eventually get a thickness of about 12" - 18", then we will plant our vegetables through a slit in the sheet mulch directly into the compost below.  Eventually, the grass under the garden will be killed, the bottom cardboard layer will decompose, and we will end up with a nice pile of rich soil, or so the theory goes!

Sunday, February 21, 2010

Planting 120 Bareroot Seedling Trees

During the last two weeks, we have been planting bareroot seedling trees.  They were purchased from the Kentucky Division of Forestry.  We bought 10 each of 12 different species:  Loblolly Pine, Flowering Dogwood, Red Mulberry, Pawpaw, Black Cherry, Persimmon, Eastern Redbud, River Birch, Chinese Chestnut, Hazelnut, Black Locust and Shortleaf Pine.  About two months ago, we planted 100 Eastern Red Cedars, and next month, we will be getting another 100 Loblolly Pines.  Our goals are increased privacy, wildlife food and shelter, erosion control, reforestation of some of the pasture, as well as some fruit and nuts for us!  Here are pictures of River Birch, Loblolly Pine and Cedar trees.


Much of our soil is clayey and badly compacted, so we are "soil staking", which means driving wooden stakes on a diagonal into the ground near the planted trees.  As the wood rots, it provides open space for the roots to grow into, and humus.  We dug the holes for the trees 8" to 12" wide and worked rich soil from the woods or near the creek into the clayey soil of the hole.  The soil from the woods helps to inoculate poorer pasture soil with mycorrhizal fungi, which has been shown to benefit new trees (see Edible Forest Gardens).  Here is Randy soil staking a Black Cherry tree in front of the cabin.